Try GOLD - Free
Gazebo Getaway
Family Handyman
|June - July 2025
Build this outdoor retreat and transform your backyard into the ultimate summer escape
The project team at Family Handyman recently joined forces to revamp an underused backyard, turning it into a modern, functional hub for outdoor living. The centerpiece? An airy gazebo that not only looks great but also offers a spacious area to relax, entertain and enjoy some shade on sunny days. This project was a true labor of love, requiring plenty of careful planning and coordination. With the proper permits pulled and materials delivered to the driveway, we were ready to get to work. Our step-by-step process walks you through the entire build. For additional photos and technical drawings, scan the QR code on the next page before you begin. Call in some extra hands, give yourself plenty of time to do it right, and remember: Rome wasn't built in a day, and neither was this gazebo!
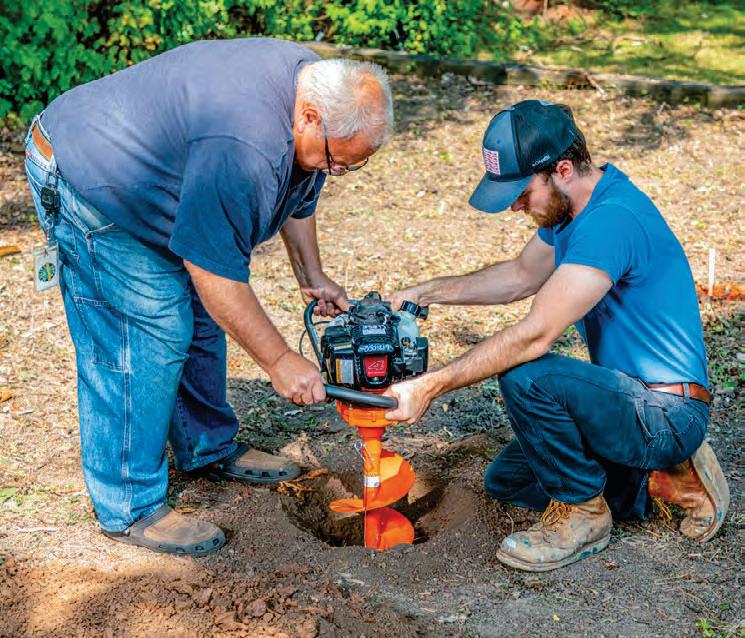
1 POUR THE FOOTINGS
The gazebo’s four 6×6 posts sit on concrete footings, arranged in a square with 101½ in. between their centers (see diagram online). The faces of the posts must end up exactly 8 ft. apart—the deck and wall measurements depend on it. Use an 8-ft. board or layout jig to confirm proper spacing before you dig.
Dig the holes for the footings using a rented auger or a manual posthole digger. Each hole should be 48 in. deep and at least 8 in. wide. Using a reciprocating saw, cut 8-in. concrete form tubes to 48 in. and place them in the holes. Make sure each tube is seated in the bottom of the hole and flush to the soil level. If your site has a grade variance, make sure the tops of the tubes are level with each other (check with a board and a 6-ft. level).

This story is from the June - July 2025 edition of Family Handyman.
Subscribe to Magzter GOLD to access thousands of curated premium stories, and 10,000+ magazines and newspapers.
Already a subscriber? Sign In
MORE STORIES FROM Family Handyman

Family Handyman
DIY Ring Toss
A simple build that blends basic woodworking with classic family fun
2 mins
April / May 2026

Family Handyman
Classic Backyard Game
Easily make your own version of this tailgating and party favorite with just a couple of tools
1 mins
April / May 2026

Family Handyman
Backyard Fireplace
It's surprisingly easy to build-and portable too
3 mins
April / May 2026

Family Handyman
Handy Hints
Try these clever low-effort tricks to make life outside easier—from the garden to the grill
1 mins
April / May 2026

Family Handyman
Smarter Spring Cleaning
From unexpected messes to everyday chores, master home care like a pro with these expert tips and tricks
4 mins
April / May 2026

Family Handyman
Patch Work
Struggling with drywall repairs or installation? Here's how to get smooth results with fewer hassles.
3 mins
April / May 2026

Family Handyman
Mini Dream Home from Scratch
A Family Handyman reader infused Victorian details into a stunning handcrafted playhouse
1 min
April / May 2026

Family Handyman
Tile-Top Coffee Table
Flex your tiling skills with a mixed-material project that brings a pop of color to your home
7 mins
April / May 2026

Family Handyman
Install Ikea Cabinets
Doing the job yourself is easier than you might think-and it can save you thousands
6 mins
April / May 2026

Family Handyman
Master Mulch
Put an extra layer on your garden to retain water, stop erosion and insulate plant roots. Here are some of the most common materials—choose the one with the biggest benefits for your yard.
1 min
April / May 2026
Listen
Translate
Change font size