
Gå ubegrenset med Magzter GOLD
Få ubegrenset tilgang til over 9000 magasiner, aviser og premiumhistorier for bare
Gazebo Getaway
Family Handyman
|June - July 2025
Build this outdoor retreat and transform your backyard into the ultimate summer escape
The project team at Family Handyman recently joined forces to revamp an underused backyard, turning it into a modern, functional hub for outdoor living. The centerpiece? An airy gazebo that not only looks great but also offers a spacious area to relax, entertain and enjoy some shade on sunny days. This project was a true labor of love, requiring plenty of careful planning and coordination. With the proper permits pulled and materials delivered to the driveway, we were ready to get to work. Our step-by-step process walks you through the entire build. For additional photos and technical drawings, scan the QR code on the next page before you begin. Call in some extra hands, give yourself plenty of time to do it right, and remember: Rome wasn't built in a day, and neither was this gazebo!
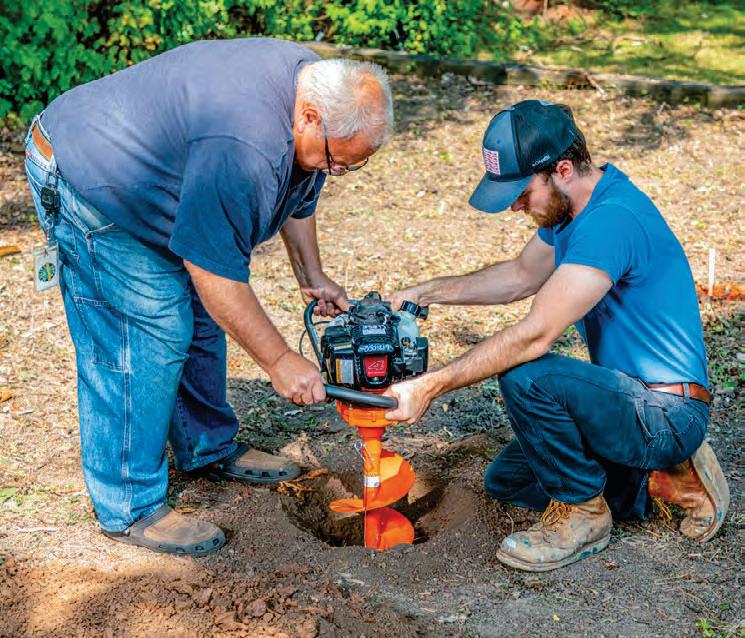
1 POUR THE FOOTINGS
The gazebo’s four 6×6 posts sit on concrete footings, arranged in a square with 101½ in. between their centers (see diagram online). The faces of the posts must end up exactly 8 ft. apart—the deck and wall measurements depend on it. Use an 8-ft. board or layout jig to confirm proper spacing before you dig.
Dig the holes for the footings using a rented auger or a manual posthole digger. Each hole should be 48 in. deep and at least 8 in. wide. Using a reciprocating saw, cut 8-in. concrete form tubes to 48 in. and place them in the holes. Make sure each tube is seated in the bottom of the hole and flush to the soil level. If your site has a grade variance, make sure the tops of the tubes are level with each other (check with a board and a 6-ft. level).

Denne historien er fra June - July 2025-utgaven av Family Handyman.
Abonner på Magzter GOLD for å få tilgang til tusenvis av kuraterte premiumhistorier og over 9000 magasiner og aviser.
Allerede abonnent? Logg på
FLERE HISTORIER FRA Family Handyman

Family Handyman
Desktop Cord Organizer
Keep your devices charged and messy cords out of sight with this clever DIY box
3 mins
December 2025 / January 2026
Family Handyman
Custom Closet Storage
Turn any closet into a clutter-free zone with this easy organizer you can build in a day
3 mins
December 2025 / January 2026
Family Handyman
Entryway Storage
Keep on-the-go gear organized with a functional statement piece for your hallway, foyer or mudroom
8 mins
December 2025 / January 2026

Family Handyman
Lazy Susan
This rotating tray fit for a feast displays your craftsmanship from all angles
4 mins
December 2025 / January 2026

Family Handyman
Handy Hints
An organized workshop makes every project run smoother. Check out these smart solutions for taming clutter.
1 mins
December 2025 / January 2026

Family Handyman
New Year, New Gym
Kick off 2026 with a home workout space that energizes and inspires you. Start here for an easy DIY to keep your gear organized, then explore ideas for quick upgrades that refresh the room.
3 mins
December 2025 / January 2026

Family Handyman
DIY Kegerator
Keep the cheer flowing with frosty pours on demand
5 mins
December 2025 / January 2026

Family Handyman
Keep Your Kitchen Flowing
The sink, garbage disposal and dishwasher are interconnected. Use these tips and simple fixes to stop slowdowns.
6 mins
December 2025 / January 2026

Family Handyman
The Art of What's Left Behind
In a country that trashes more than 12 million tons of furniture every year, one resourceful woodworker is proving there's beauty—and a business—in the scraps
3 mins
December 2025 / January 2026
Family Handyman
Great Goofs
DIY projects don't always go as planned. These readers learned the hard way!
1 min
December 2025 / January 2026
Listen
Translate
Change font size