
STEP 2: I like to start with the fine and most difficult details first, which in this case is the beak (‘maxilla’). I will use mainly white, cream, browns, soft greys and Earth Green. I follow the reference as closely as possible.
STEP 3: I then continue with the area above the beak (‘cere’) and the nostril (‘nare’). Using much the same colours as previously but adding yellow and oranges. As I work on the cere, I add more yellow and shadow to the maxilla to ensure it makes a unit. I also draw in the small fine feathers next to the mandible, again making sure my highlights are in place and looking realistic. The pastel mat allows for many layers, which makes it easier to add white on top.
STEP 4: Next is the eye. I prefer working on the eye in the early stages to bring the subject to life. Here I use white, browns, orange, pale pink and greys. As you will see in the iris, I do not use a black pencil at all. I rarely use a black pencil but prefer a mix of browns, blues and greens for the darkest parts.
STEP 5: I now work on the ‘lore’ which is the area between the eye and the beak. Again I am using white, cream, soft greys and browns. I make sure my brown pencil is kept sharp for the fine areas.
This story is from the Issue 48 edition of The South African Artist.
Start your 7-day Magzter GOLD free trial to access thousands of curated premium stories, and 8,500+ magazines and newspapers.
Already a subscriber ? Sign In
This story is from the Issue 48 edition of The South African Artist.
Start your 7-day Magzter GOLD free trial to access thousands of curated premium stories, and 8,500+ magazines and newspapers.
Already a subscriber? Sign In

Oil Painting Essentials
Tips and techniques: oils
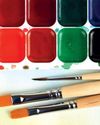
Tips And Techniques: Watercolours
Tips and techniques: watercolours
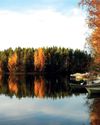
How To Paint A Classic Autumn Scene
Who can resist painting an Autumn scene?

small towns & the big city
The sight of a print of Tretchikoffs "Dying Swan" on the wall at a friend’s house, when David Roux was only five years old, was the start of a lifelong interest in art.
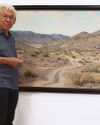
life and landscapes
Johan Coetzee’s journey to becoming a full time artist began long before he went to college.

the shape of colour
FEATURED ARTIST: SHAKES TEMBANI
coloured roses in aquarelle
TIPS AND TECHNIQUES: GOLDFABER AQUA
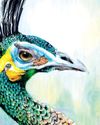
colourful peacock
TIPS AND TECHNIQUES: CHAMELEON PENS

a South African artist makes his mark in New York
FEATURED ARTIST: LUKE BAGGOTT
Painting With The Zorn Palette
The Zorn palette is named after Anders Leonard Zorn (February 18, 1860 – August 22, 1920), an internationally successful artist from Sweden.