
Gå ubegrenset med Magzter GOLD
Få ubegrenset tilgang til over 9000 magasiner, aviser og premiumhistorier for bare
Prøve GULL - Gratis
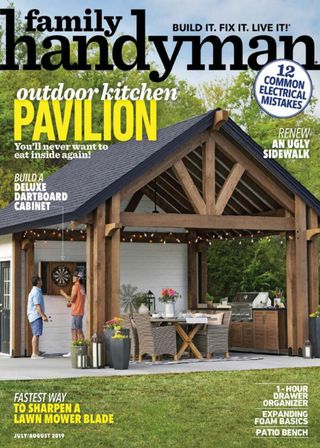
Viking Bench
Family Handyman
|July - August 2019
Stylish seating, made from construction lumber!

If you think this bench looks sturdy, you’re right; it’s brawny enough to withstand decades of hard use. But if you think it’s complicated, take a close look at the following pages. You’ll see how simple it is to turn inexpensive framing lumber into graceful curves.
Create the legs
Start with flat, straight boards—free of splits, twists, cupping and loose knots— and you’ll spare yourself a lot of head-scratching and extra work down the road. I chose Douglas fir lumber, but any 1-1/2-in.-thick stock will do. If you have trouble finding perfect 2x12s for leg material, purchase extra lumber so you can cut around the defects.
To create a single bench, cut the four 22-in. leg blanks (A) to length; the ends need to be square, so cut carefully. Pair up your boards so when one is laid atop the other, there is little or no gap along the ends and edges. If you flip or rotate the boards, you might find the perfect fit. Try to have any defects fall in the areas of the wood you’ll be cutting away as you form the legs.
Build the legs
Mark out your leg template on 1/4-in. plywood as shown in Photo 1. Cut just outside the line with a fine-tooth jigsaw blade, then use a belt sander to sand right up to the line.
Use your template to mark the leg shape on all four leg parts (A). With the marks facing up, lightly dampen one board—polyurethane glue needs moisture to work—then apply the glue in squiggles across the main body of the leg. Use a putty knife to spread it slightly beyond the edges of your template marks. Polyurethane glue is waterproof, and with tightly glued seams there’s less chance of moisture working its way between the boards.
Denne historien er fra July - August 2019-utgaven av Family Handyman.
Abonner på Magzter GOLD for å få tilgang til tusenvis av kuraterte premiumhistorier og over 9000 magasiner og aviser.
Allerede abonnent? Logg på
FLERE HISTORIER FRA Family Handyman

Family Handyman
Desktop Cord Organizer
Keep your devices charged and messy cords out of sight with this clever DIY box
3 mins
December 2025 / January 2026
Family Handyman
Custom Closet Storage
Turn any closet into a clutter-free zone with this easy organizer you can build in a day
3 mins
December 2025 / January 2026
Family Handyman
Entryway Storage
Keep on-the-go gear organized with a functional statement piece for your hallway, foyer or mudroom
8 mins
December 2025 / January 2026

Family Handyman
Lazy Susan
This rotating tray fit for a feast displays your craftsmanship from all angles
4 mins
December 2025 / January 2026

Family Handyman
Handy Hints
An organized workshop makes every project run smoother. Check out these smart solutions for taming clutter.
1 mins
December 2025 / January 2026

Family Handyman
New Year, New Gym
Kick off 2026 with a home workout space that energizes and inspires you. Start here for an easy DIY to keep your gear organized, then explore ideas for quick upgrades that refresh the room.
3 mins
December 2025 / January 2026

Family Handyman
DIY Kegerator
Keep the cheer flowing with frosty pours on demand
5 mins
December 2025 / January 2026

Family Handyman
Keep Your Kitchen Flowing
The sink, garbage disposal and dishwasher are interconnected. Use these tips and simple fixes to stop slowdowns.
6 mins
December 2025 / January 2026

Family Handyman
The Art of What's Left Behind
In a country that trashes more than 12 million tons of furniture every year, one resourceful woodworker is proving there's beauty—and a business—in the scraps
3 mins
December 2025 / January 2026
Family Handyman
Great Goofs
DIY projects don't always go as planned. These readers learned the hard way!
1 min
December 2025 / January 2026
Translate
Change font size