يحاول ذهب - حر
JOINTER Tune-Up
August-September 2020
|Woodcraft Magazine
Simple steps that yield smooth, square stock edges

The jointer is one of those “heaven or headache” tools. When it’s working properly, it makes quick, sweet work of straightening and flattening boards. However, a poorly-tuned jointer can cause no end of frustration, yielding crooked edges, weirdly tapered pieces, and washboard surfaces.
Though a relatively simple tool, the jointer requires an exacting setup. Fortunately, it’s not that difficult to tweak the tool into proper working order. All you need is a good straightedge, a simple shop-made jig, a few common workshop tools, an automotive feeler gauge, and a bit of patience. The set-up sequence involves checking the tables for flatness and parallelism, correcting them if necessary, and then adjusting a set of sharp knives to the proper height. The entire procedure should only take an hour or so, paying big dividends in accuracy and time saved down the line.
Check the tables
Make sure your outfeed table is set to its proper height in relation to the cutter head and knives. As shown in the drawing on the facing page, it should be level with the knives when they are at the top dead center. Check this with a straight piece of wood (about 1/2× 11/4× 18). With the machine unplugged, rest the piece on the outfeed table with about 2 extending over the cutter head. Rock the cutter head while adjusting the outfeed table until a knife just barely grabs the piece. Lock the table.
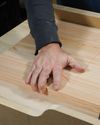
Check each table for flatness as shown. Humps or dips can compromise operational accuracy. If a tune-up doesn’t correct problems, it may just be time to invest in a better machine.
هذه القصة من طبعة August-September 2020 من Woodcraft Magazine.
اشترك في Magzter GOLD للوصول إلى آلاف القصص المتميزة المنسقة، وأكثر من 9000 مجلة وصحيفة.
هل أنت مشترك بالفعل؟ تسجيل الدخول
المزيد من القصص من Woodcraft Magazine
Woodcraft Magazine
Beech
Plain looks, but a solid performer
4 mins
August - September 2023
Woodcraft Magazine
Working with PLASTIC LAMINATE
Adding a durable, smooth, and colorful surface to your work
5 mins
August - September 2023
Woodcraft Magazine
High-Tech ROUTER TABLE
A state-of-the-art shop essential
6 mins
August - September 2023

Woodcraft Magazine
Albers-Inspired NESTING TABLES
A colorful array of Bauhaus utility
5 mins
August - September 2023

Woodcraft Magazine
Desktop ORGANIZERS
Mini modules for your modern workspace
4 mins
August - September 2023

Woodcraft Magazine
Joiner's MALLET
A hard-hitting shop hammer
3 mins
August - September 2023
Woodcraft Magazine
Battery-backed biscuiting
DeWalt 20V Max XR Biscuit Joiner
3 mins
June - July 2023
Woodcraft Magazine
Crosscut SLED
A basic build of a crucial table saw accessory
6 mins
June - July 2023

Woodcraft Magazine
Power-carving BOWLS
Tools and techniques for sculpting
2 mins
June - July 2023

Woodcraft Magazine
Library STEPS
Mitered box joints give rise to an updated classic
5 mins
June - July 2023
Translate
Change font size
