Admit it: You’ve always wanted to learn how to weld. This pro will show you how.

Welding intimidates a lot of people, even some of us hardcore DIYers. And that’s a shame because welding opens up a whole new world of household repairs and cool projects. We asked a pro welder to demonstrate some basic techniques by building a welding table. She’ll walk you through each step and provide helpful tips along the way.
A metal welding table is the perfect project to start with because you can build all your future welding projects on it. The materials will cost about $160.
This table was built using a Lincoln 210MP. This machine can function as a MIG (metal inert gas/wire feed) welder, a TIG (tungsten inert gas) welder and a stick welder, but we used the MIG wire-feed function. To learn more about the equipment needed to get started in welding, including advice on how to choose a machine, check out our March ‘18 issue, p. 16.
1. CUT METAL WITH A CHOP SAW
Fourteen-inch metal-cutting saws like this, outfitted with an abrasive blade, cost $100 to $200. These saws can cut bricks and pavers as well. A large metal-cutting saw with carbide teeth cuts metal like butter and with less burrs, but it will set you back more than $250. Never put a carbide-tooth blade on an abrasive saw because this saw runs at twice the rpm, a speed that could destroy the blade or worse. Miter saws designed to cut wood also spin too fast for metal-cutting blades, and since their motors aren’t sealed, the metal chips and shavings can destroy the motor.
2. GRIND THE EDGES
This story is from the May 2018 edition of The Family Handyman.
Start your 7-day Magzter GOLD free trial to access thousands of curated premium stories, and 8,500+ magazines and newspapers.
Already a subscriber ? Sign In
This story is from the May 2018 edition of The Family Handyman.
Start your 7-day Magzter GOLD free trial to access thousands of curated premium stories, and 8,500+ magazines and newspapers.
Already a subscriber? Sign In

7 Bicycle Maintenance Tips
Keep your bike in tiptop shape and ride safe!

SETTING FENCE POSTS WITH EXPANDING FOAM
Any fence builder knows you need strong posts for a strong fence, and that means backfilling the postholes with a dense, hard material other than dirt.
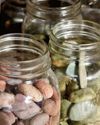
PEBBLE MOSAIC STEPPING STONES
COLLECT SOME RIVER ROCK AND MAKE YOUR OWN UNIQUE STEPPINGSTONE PATH

EARTH-FRIENDLY WEED KILLERS
HEALTHIER CHOICES FOR HUMANS AND THE ENVIRONMENT
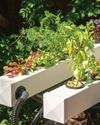
DIY! HYDROPONIC GARDEN
FRESH VEGETABLES AT YOUR FINGERTIPS

GROW MINI VEGETABLES
GROW A GARDEN IN A TINY SPACE!

BUILD A VERTICAL GARDEN
TIME TO GROW UP!
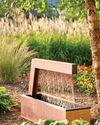
MODERN WATER FOUNTAINS
A SPLASH OF PEACE FOR YOUR PATIO
9 ALTERNATIVE USES FOR SAWDUST
Every fully stocked wood shop has a table saw. You can usually find a pile of sawdust under it, even if it's used only occasionally. If a shop has a belt sander or band saw, there's probably another pile of finer sawdust under that. Even people without stationary tools have sawdust accumulation on their workbenches.
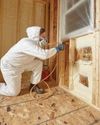
INSULATE WITH FOAM
IT'S A GREAT ALTERNATIVE TO FIBERGLASS