
Butcher block countertops are tough as nails and the perfect choice for a garage workbench. But that doesn’t mean they have to be ordinary. I made this design by routing out a hexagon pattern, laying LED strips in between and covering them with epoxy. Flip ping that light switch at the end of the day signals that it’s time to put away the tools, sip—and relax.
1 START THE HEXAGON TILES
To cut the 15 hexagon tiles, you’ll need a jig. I started with a 2-ft. x 2-ft. melamine sled. I set my table saw fence to 12 in. and made a partial cut into the sled. I attached a fence at a 120-degree angle with a few screws then fastened a pair of toggle clamps to the fence. Then, I cut 8-1/4-in.-wide strips of 3/4-in. plywood into 10-in. pieces until I had 16 parallelograms.
2 FINISH THE HEXAGON TILES
For the rest of the cuts, clamp a stop block with a 30-degree angle at one end against the fence 4-5/8 in. away from the saw kerf. Clamp the plywood parallelograms into the jig, cut one side, then rotate and repeat until you’ve got a pile of hexagon tiles.
3 CREATE THE PATTERN
Lay out the tiles on the butcher block top, using spacers just like you would if you were tiling a floor. To make the spacers, I ripped 3/4-in.-wide hardwood strips. (The edge of nominal 1-by material is too narrow to use as a spacer for my 3/4-in. router bearing.) Then I cut the strips into 3-in. lengths. I secured the tiles with dabs of hot glue and brad nails.
4 ROUT THE PATTERN
This story is from the July - August 2021 edition of Family Handyman.
Start your 7-day Magzter GOLD free trial to access thousands of curated premium stories, and 8,500+ magazines and newspapers.
Already a subscriber ? Sign In
This story is from the July - August 2021 edition of Family Handyman.
Start your 7-day Magzter GOLD free trial to access thousands of curated premium stories, and 8,500+ magazines and newspapers.
Already a subscriber? Sign In

7 Bicycle Maintenance Tips
Keep your bike in tiptop shape and ride safe!

SETTING FENCE POSTS WITH EXPANDING FOAM
Any fence builder knows you need strong posts for a strong fence, and that means backfilling the postholes with a dense, hard material other than dirt.

PEBBLE MOSAIC STEPPING STONES
COLLECT SOME RIVER ROCK AND MAKE YOUR OWN UNIQUE STEPPINGSTONE PATH

EARTH-FRIENDLY WEED KILLERS
HEALTHIER CHOICES FOR HUMANS AND THE ENVIRONMENT
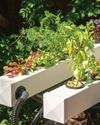
DIY! HYDROPONIC GARDEN
FRESH VEGETABLES AT YOUR FINGERTIPS

GROW MINI VEGETABLES
GROW A GARDEN IN A TINY SPACE!

BUILD A VERTICAL GARDEN
TIME TO GROW UP!
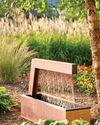
MODERN WATER FOUNTAINS
A SPLASH OF PEACE FOR YOUR PATIO
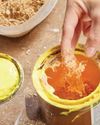
9 ALTERNATIVE USES FOR SAWDUST
Every fully stocked wood shop has a table saw. You can usually find a pile of sawdust under it, even if it's used only occasionally. If a shop has a belt sander or band saw, there's probably another pile of finer sawdust under that. Even people without stationary tools have sawdust accumulation on their workbenches.

INSULATE WITH FOAM
IT'S A GREAT ALTERNATIVE TO FIBERGLASS