
Plastic laminate is durable, affordable, and easy to maintain. And the bonus? It offers patterns, colors, and DIY edge profiles you can’t get with other countertop materials. Plus, you can install an undermount sink and do it all yourself.
We built our kitchen island countertop and installed the 33-in. Karran E-540 sink with just basic tools and know-how. Follow the details here and you won’t have to worry about water damaging your laminate countertop material.
1 PLACE AND CUT OUT SINK
After you size the substrate and apply the laminate to the edges, mark the location of the sink. Place the sink 2-1/2 in. back from the front edge of the countertop and center it on the cabinet. When you’re tracing the sink shape onto the substrate, keep your pencil vertical so the cutting line is offset about 1/8 in. Drill a 1/2-in. starter hole and cut out the sink opening with a jigsaw.
2 LAYING OUT LAMINATE
Rough-cut the sheet of laminate to fit the substrate, leaving an extra 1 in. all around. Place the laminate on the substrate and mark the sink cutout on the bottom.
3 SECURE
THE SINK For a rectangular sink, glue, and staple four strips of 3/4-in. particleboard to hold the sink in position by its rim. Use several short blocks to hold a round sink.
4 MAKE SURE IT’S FLUSH
This story is from the September 2021 edition of Family Handyman.
Start your 7-day Magzter GOLD free trial to access thousands of curated premium stories, and 8,500+ magazines and newspapers.
Already a subscriber ? Sign In
This story is from the September 2021 edition of Family Handyman.
Start your 7-day Magzter GOLD free trial to access thousands of curated premium stories, and 8,500+ magazines and newspapers.
Already a subscriber? Sign In

7 Bicycle Maintenance Tips
Keep your bike in tiptop shape and ride safe!

SETTING FENCE POSTS WITH EXPANDING FOAM
Any fence builder knows you need strong posts for a strong fence, and that means backfilling the postholes with a dense, hard material other than dirt.
PEBBLE MOSAIC STEPPING STONES
COLLECT SOME RIVER ROCK AND MAKE YOUR OWN UNIQUE STEPPINGSTONE PATH

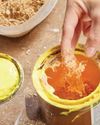
EARTH-FRIENDLY WEED KILLERS
HEALTHIER CHOICES FOR HUMANS AND THE ENVIRONMENT
DIY! HYDROPONIC GARDEN
FRESH VEGETABLES AT YOUR FINGERTIPS

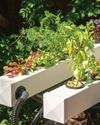
GROW MINI VEGETABLES
GROW A GARDEN IN A TINY SPACE!

BUILD A VERTICAL GARDEN
TIME TO GROW UP!
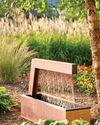
MODERN WATER FOUNTAINS
A SPLASH OF PEACE FOR YOUR PATIO
9 ALTERNATIVE USES FOR SAWDUST
Every fully stocked wood shop has a table saw. You can usually find a pile of sawdust under it, even if it's used only occasionally. If a shop has a belt sander or band saw, there's probably another pile of finer sawdust under that. Even people without stationary tools have sawdust accumulation on their workbenches.
INSULATE WITH FOAM
IT'S A GREAT ALTERNATIVE TO FIBERGLASS